Sunday, 29 November 2015

Sorry!

 I'm starting to think I'll never keep a promise I make on this blog!
29 days into November and still no post of my Halloween costume.
But I'm here and I've got not one, but 3 Halloween looks from this year!

The first look actually took the longest to construct. It was for the local bar crawl that most Uni students enjoy taking part in.
True to form I was the most overly made up person in the clubs but HEY thats the way I like it!
I created a half Frankenstein stiched up face using paint, embroidery thread, liquid latex and some scarring liuid that I can never remember the name of!
I wore one black contact lense and one green and a black wrap around pony tail. Finally I sprayed the rest of my hair black with two strips of white.
 The second look was for a house party we decided to through the friday before halloween. As it was only a small gathering I didnt go too majorly dressed up (for me anyway!). I found a dress on eBay that I totally fell inlove with, so decided to become the character on it: Corpse Bride!
It took me 3 attempts of redoing the makeup and even the final look I wasn't happy with (as you can see by the comment I posted in the picture from snapchat: oh add me if you like! It's "ditsybubble")
This look was basically a black wig, blue, white, and black face paint, pink lipstick and two sets of eyelashes stuck to either sid of my overly drawn on eyes,

 This final look was the most prepared for (starting in August!)
The ICE QUEEN!
The head piece was made by hand. A white wig, papier mache horns painted silver, fake ivy, fake white flowers, silver sprayed old extensions and a lot of hot glue and glitter! Stencils were used to create snowflakes on my fake and neck and rhinestones were glued to eyelashes then painted white. Black contacts were worn.
** WARNING- do not wear cheap contacts for extended periods of time! I had a head ache the whole of the next day from wearing them for 12 hours! And very sore eyes**

Hope you enjoyed these looks! Comment below with your halloween costumes or post our pics if you decide to recreate any of these!

xx

Monday, 14 September 2015

Update


Once again I've neglected this page and not sure how or where to start up again!
Well here's a list of where I am in life since I last posted:
I turned 22.
I finished my second year of Graphics design at University and heading into the third and final year in the next few weeks.
I've been on counless holidays!
I started teaching swimming, but only for a year and a bit. I quit this summer to focus on my Uni course.
I played for the University netball team for the second year. Unfortunately work got in the way for a lot of it but this year my time table is a bit more flexible!

In a previous post I mentioned a Halloween costume which consisted of a black wig, yellow contacts and blue body paint. Well I guess I've kept you waiting for a stupid amount of time to reveal the end result, so without further a do.... Here is my Halloween costume of 2014 (very late I know!)

AVATAR!


Unfortunately I never managed to get a clear photo of the whole outfit as it was late at night and the house had terrible lighting!
The outfit took weeks of painting, sewing and cutting expecially as each part of the costume would trickle in through the post as most of it came from ebay.
This year is no different and I already have some of the pieces in transit from good old China!
So far I have bought: Feathers, twigs,silver and white spray paint and a white wig... much much more to order, but lets see if you can have a guess what this years outfit will be.
Oh and I promise to post nearer Halloween this time so you dont have to wait over a year for me to get my butt in gear!

Comment down below your halloween outfit ideas!

Much love
Ditsy 
xx

Friday, 28 March 2014

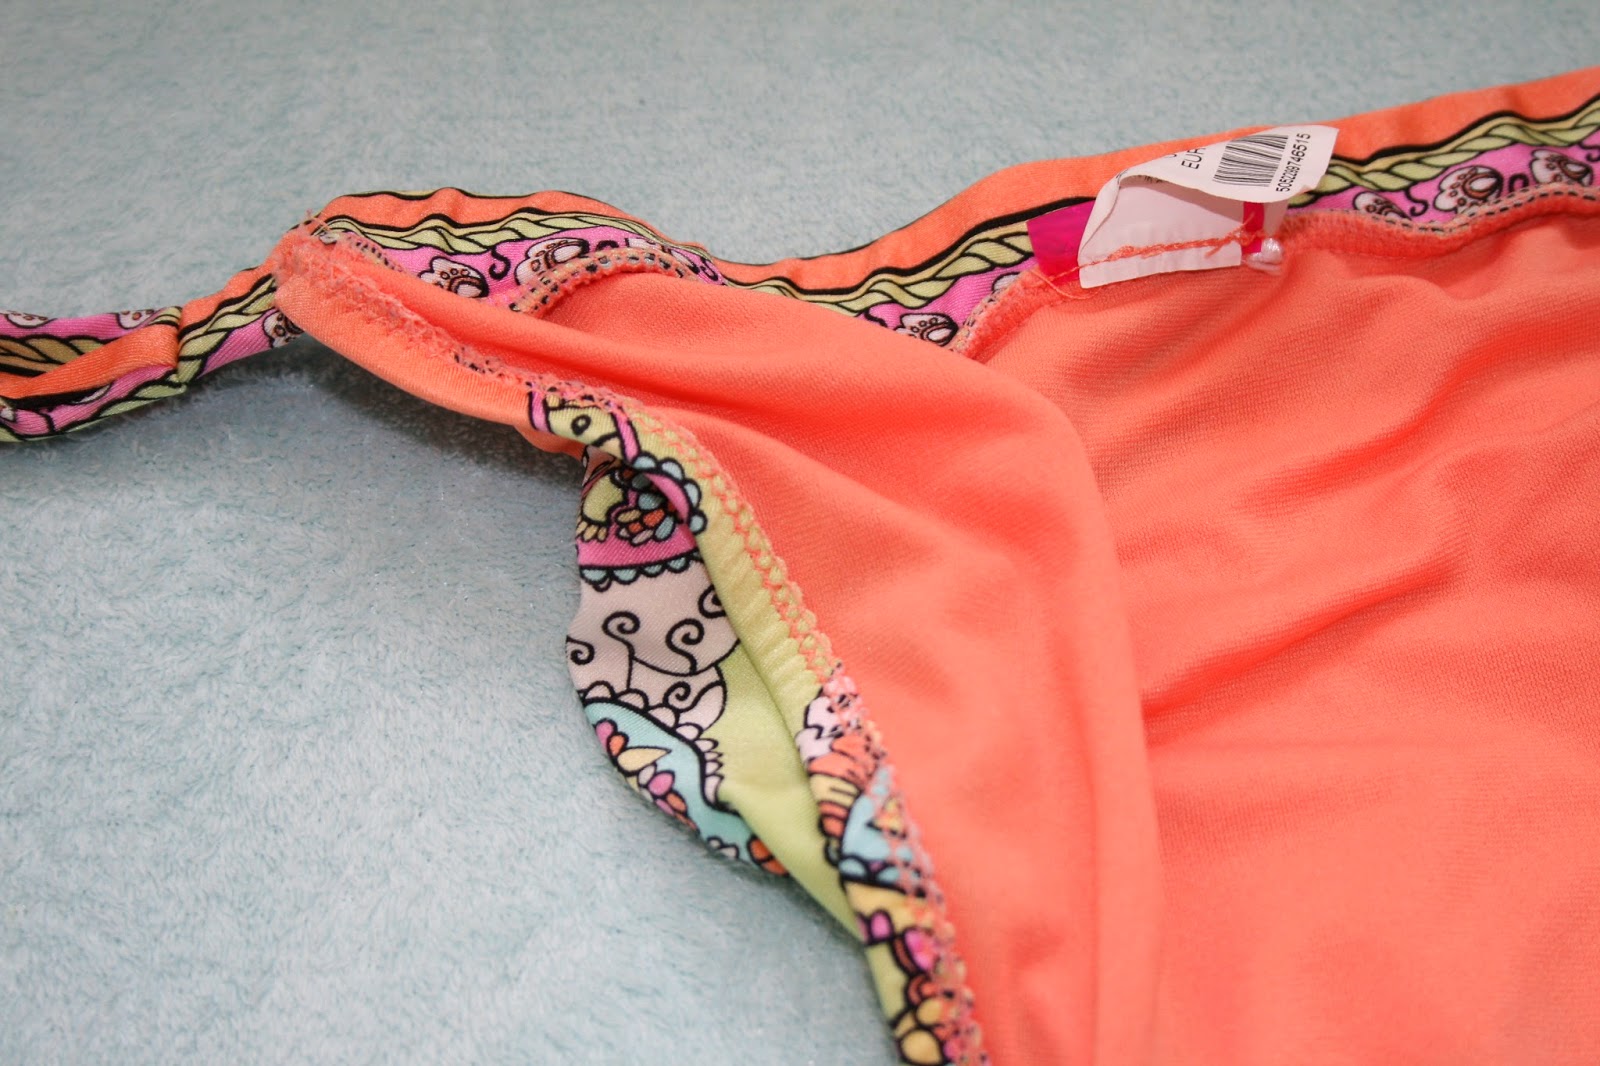
DIY- Scrunch bum bikini

 An easy DIY to jazz up your bikini and give a virtual butt lift to your booty!

What you will need: 
Bikini bottoms
Scissors
Needle
Thread (preferably a similar colour to your bikini) 
Pen 
Ruler 
Step one: Untie your bikini straps if they have them, or turn your bottoms inside out if not. 

Step two: If your bikini has a double layer on the bum, you will need to cut out the inner layer along the inside of the seam.


 Step three: Measure and draw a line down the centre of the bottoms, starting at the top and working your way down to the stitching.

Step four: Grab your needle. Thread it so it is doubled and tie a knot at the end. 
Step five: Start at the stitching at the bottom of the line you drew and sew two or three loops to secure the thread to the bottoms (We don't want it coming undone!)
 Step six: Sew a running stitch about 1cm apart along your line to the top of the bikini.
 Step seven: Begin to pull your thread at the top so that the bikini begins to scrunch!
**It's up to you how much you want to scrunch your bottoms, so try on your bikini and pull until the desired scrunch is achieved!**
 Step eight: Sew a few loops at the seam, similar to the ones you started with, at the top of the bikini to secure the bottoms in place.
 Step nine: Tie a knot or two to give extra security
 Step ten: Cut off an excess thread.
 Tie up your string at the side or turn your bikini the right way around and you are FINISHED!

I hope you found this helpful! If you tried this out, link your pictures down below! I'd love to see the finished results!

Hope you all have a great day

Much love
Ditsy
xx


Monday, 6 January 2014

The Most Amazing Fruit Smoothie

Finally an easy and cheap smoothie that tastes incredible! 

What you will need: 
A blender 
A chopping board 
A sharp knife
One Banana
4 or 5 Strawberries 
Orange Juice
What to do:
1. Peel the banana and chop the tops off the strawberries
2. Chop the banana and strawberries into smallish sections and put them into the blender
3. Pour the orange juice to the top of the fruit
4. BLEND! till smooth
5. Pour and enjoy!

You can adjust the amount of each ingredient to your desire to make the perfect, sweet but HEALTHY drink!
Perfect to start your day off in the morning or as a snack to keep you full till dinner
Hope you enjoy this smoothie as much as I do!

Tuesday, 5 November 2013

My secrets to long full lashes

Pssstttt... 
Wanna get full, long, thick lashes? Here's my holy grail products...

1. LancĂ´me's cils booster- eyelash primer (£21 from John Lewis) 
Now this little baby I have repurchased 3 times already and need to get another soon! 
The basic idea of it is to use before your mascara to prime your lashes with a white cream base that dries transparent. The end result? 
It protects your natural lashes from the harsh chemicals that some mascaras contain.
It enhances the colour of the mascara (unlike most eyelash primers that leave a black mascara looking a dull gray) 
And adds a layer of thickness and length to your lash.

Personally I find the product more lengthening than thickening, but the results are still noticeably different! 

2. Max Factor's eye brightening, tonal black volume sing mascara (£6.99 from super drug) 
This product suggests that it's unique coloured formular brightens the look of your eye's natural colour. 
I don't agree.
However why I love his mascara so much is is ability to separate my lashes without minimising the volume that the eyelash primer supplies us with.
The product appears to last all day and I've had no problems with smudging or smearing down my face, even during a long, hot, sweating netball match! 
I still don't believe it's my all time favourite mascara and I'm still deciding if I want to repurchase it or keep looking, but it sure does the job nicely atm. 

3. Divaderme lash extender (lashes in a bottle) (£9.99 from amazon) (was £6.49 when I bought it a month ago! So quick buy it now before it gets more expensive!) 
Now this baby isn't well know and I simply can't fathom why more people are raving about this product! 
How to use:
After applying a genrous layer of mascara on BOTH sides of your lashes! (That means ontop too ladies!) quickly brush on the lash extenders wand over the wet mascara. Leave to set for a few seconds then apply another coat of mascara to seal in the little micro fibres. 
Ditsy's top tips: 
A thick brushed mascara helps to apply more product to help the fibres stick
A plastic brushed mascara (like the one mentioned above) helps to separate any major clumps that my have formed
Place a piece of toilet roll or tissue under your eye because this can get messy! 
Add as many layers as you want to get longer and thicker lashes, but be warmed, the greedier you get, the more likely the lashes may clump to the extent that your mascara wand cannot seep rate them! This is me talking from experience! Two layers of these micro fibres are plenty! 

Hope these tips help! Photos are still to come! 

Much love 
Ditsy 

P.s. I'm not being sponsored by any of these companies products... I genuinely love them! 

My Halloween costume 2013


So Halloween was an interesting night all round. Drinks, drama and a disgusting mess of a house the day after! 
But costume wise there were some amazing creations and everyone made a great effort!
For my costume... Drum roll please.... 
A Werewolf! 
Now if you're planning on wearing contacts like I did.. Please put them in before you start the makeup! Putting the contacts in after only meant I had to redo half of the eye makeup! Plus it gives your eyes time to adjust before you show the world your fabulous costume! 
However if you have sensitive eyes I would advise against the contacts, if placed poorly or a low budget contact is used they can be extremely irritating for the eyes! You have been warned. 
Hope you all had a great Halloween and enjoy the Fireworks tonight if you haven't already this weekend! 
Much love 
Ditsy 

Tuesday, 15 October 2013

Long time no post!

Wow it has been a while since i posted on here! I guess life got in the way. 
University is crazy busy. Add work, ice skating, rock climbing and netball to the mix and you've got a very busy girl! 
But it's all about time management. I'm very good at writing timetables and lists and schedules, but sticking to them is another thing! 
In school I never got into the habit of coming home and doing my homework first thing... I was always straight on the sofa watching TV!
But they say its never to late to teach an old dog new tricks... so I am teaching myself to get the work done the day it's set... if possible (due to the list above!)
It's hard... I'm not going to lie! 
Especially as I have recently LOST one of my sketchbooks that has all my work in for a deadline on monday! Not cool. I'm hoping I've left it at Uni and it's been handed in at lost property! 
*pray for my sketchbook to be found!*
Fashion is becoming a bigger part of my life... unfortunately my bank balance can't keep up with it!

Halloween is right around the corner and I have some wicked ideas for you artistic beauties to try out! 
I'll give a clue... one involves yellow contacts... a black afro wig and a WHOLE LOT of blue paint! see if you can guess ;) 
Keep an eye out on my youtube channel for the tutorials and of course I shall post pictures and details of the items used on here!
Hope to be more active on the blogging and YouTube community! 
Much Love 
Ditsy Bubble
xx

Thursday, 6 December 2012

5th December 2012

On the 5th day my mother gave me... A pack of playing cards! Because every student needs cards! :)

Tuesday, 4 December 2012

4th December 2012

Day 4 of the advent calendar... A mini shower cream wash! How cute!

Sunday, 2 December 2012

2nd December 2012

Day 2 of the Advent Presents are a gorgeous par of gold reindeer earrings!
Not only are they cute in general but quite plain so they can be worn all Christmas! I don't plan on taking these out until all the Christmas decorations are down! And even then Im not sure I will want ot take them out!
Here's a random fact about me... I only wear gold jewellery! I use to only wear silver (thinking gold was tacky) but then I realised it made me look even more pale and accentuated my already visible veins! So gold makes me seem more tanned and doesn't highlight the blue tones in my skin


Oh and check out the new Christmas Nails Tutorial on my Youtube Channel!
Christmas Reef Nail Tutorial

Ditsy Bubble xx

Saturday, 1 December 2012

1st December 2012


The first Package...
A 'Merry Christmas' Banner!!


In the Ditsy Household we always like to make an effort with the christmas decorations, especially the christmas lights on the front of the house! 
Being a poor Uni student my mother has kindly ensured I do not miss out on the decorating and sent me a wonderful felt banner which had currently been hung above my bed! 

The banner has been bought from Sainsburys and was £5! 

Ditsy Bubble

My wonderful Mum


Having their first child go away to uni is always hard for a mother. Missing them is inevitable and so they must find a way to find their time or keep in contact with their child.
Skype or phone calls are most popular and even some go old school and write letters.
My mother and I have used all these types of communication with the addition of send parcels.
Being the creative person that she is, my Mum can never just send any old normal package. It will always be a surprise and a mystery as to what I receive and when I receive it and 5 days ago was no difference...

Ive always received a slip that states the 'small package' has arrived, so I became very intrigued when a 'large package' came.
 When I opened it up I knew my mother had been busy!

It was my advent calendar for the year! 21 individually wrapped presents and a christmas outfit to wear on a night out!

Now this is not the norm for the Ditsy Household, a chocolate calendar always does the trick! But with a big change of me moving away, my mother has decided a change is in order for a few of our traditions!

So I would like to share with you lovely Bloggers each gift I open every day up until the 21st December when I return home :) 

Keep checking out this blog if you would like to see the wonders my mother has sent me!

Ditsy Bubble 

Don't forget to check out my youtube channel too! A new christmas nails tutorial will be up very soon!

Wednesday, 31 October 2012

Halloween Costume

Wass up guys and girls!
This is a few images of my halloween costume this year and the video to go with it! Hope you enjoy!


Don't forget to check out the video to see how this was all created! 

Saturday, 21 July 2012

Holiday Haul ☀

Lovely day out with my sister at Brent Cross!
I finally lost my MAC virginity!
Found some absolute bargains!
And got some perfect tshirts to decorate! (keep an eye out for the next blog with pictures of what I'm doing to them :) )

Monday, 9 July 2012

People are actually watching my videos!

It's amazing! Yesterday i noticed that my jubilee nail art video had a sudden burst of views! It went from about 200 to 500! So I took a print screen of it last night and now, the next day, it went up to 756 views! I don't understand where or why people are suddenly watching it but it feels so good to have more than 7 views on a video :P
So thank you to anyone that have watched my videos and I hope you continue to enjoy them :)

Tuesday, 26 June 2012

Barry M-arvellous!

Has anyone checked out the Barry M section in Superdrug lately? I swear by this make on most of their products!
So some of their latest products have really intrigued me!
Firstly their lipsticks...
At first I tried their number 147 and I'm going to be honest... I was shocked at how bad it was! So the range is called 'Lip Paint' but that doesn't mean it should look like I've literally painted my lips with some thick acrylic paint!

My expectations had lowered considerably for Barry M and I thought that imma have to look around for a better make... but then a friend asked me to buy her some Lip paints because she was unable to get it where she is. For reasons I'm not going to go into, she didn't want them anymore and so I kept them. The colours were 100 and 153. 100 being a really light baby pink
 and 153 being a bright pinky/corally colour.
I tried them out and the constancy was the same... but hold the phone... this time i actually rubbed it in with my finger and guess what... It looked good!
So with my faith restored I went back to Superdrug and found this absolute treasure...
It's Barry M's TMLP... A green looking lipstick which, when applied, changes to a gorgeous pink which gets matures and becomes darker as the day goes on! It continues to confuse and shock people but the end result is always the same... they are amazed by the stunning pink thats left on your lips.
The consistency is different to the lip paint as it is thinner and lighter, which to me is even better!

Barry M (to me anyway) seems to be the company that invent the latest nail miracles! They were the first company I saw that did 'Crackle',
they've now come out with a metallic nail varnish, which when a magnet is hovered over, changes the design to an amazing stripy pattern!
I'l admit that the colour choices are limited at the moment but I'm sure they will come out with more if the product becomes as popular as the Crackle did!
Another product is the Chameleon. Now I won't lie that although what the product does is amazing, it doesn't give that easy to apply, instant design.
The idea is that you apply  one of the colours to your nails (lets say a purple), you then apply a top coat to it and the colour magically changes to another colour! Cool right? So skilled nail artists can use this to create stripes and dots and all sorts of two toned designs, but for those that are more lazy, the magic of this product won't be know to others because they won't know it was once another colour unless you tell them!

If you would like me to do some videos on these products in action then leave a comment below :)
Have a great day! xx